Greetings! If you’ve ever dealt with removing a datastore in vCenter, you know the challenge: the partition table on the linked LUN gets wiped out, often leading to the fear of data loss when trying to reconnect the datastore. In this guide, we’ll walk you through a method to potentially restore a partition table without risking your valuable data.
Important Note: While we provide these steps to help you, please remember that handling partitions requires care. Mistakes could result in data loss not only on the target datastore but also on other storage. Proceed with caution.
Identifying the Datastore Path
Start by identifying the path to your datastore. Open vCenter's web interface, head to the "Host Configure" tab, and select "Storage Devices."
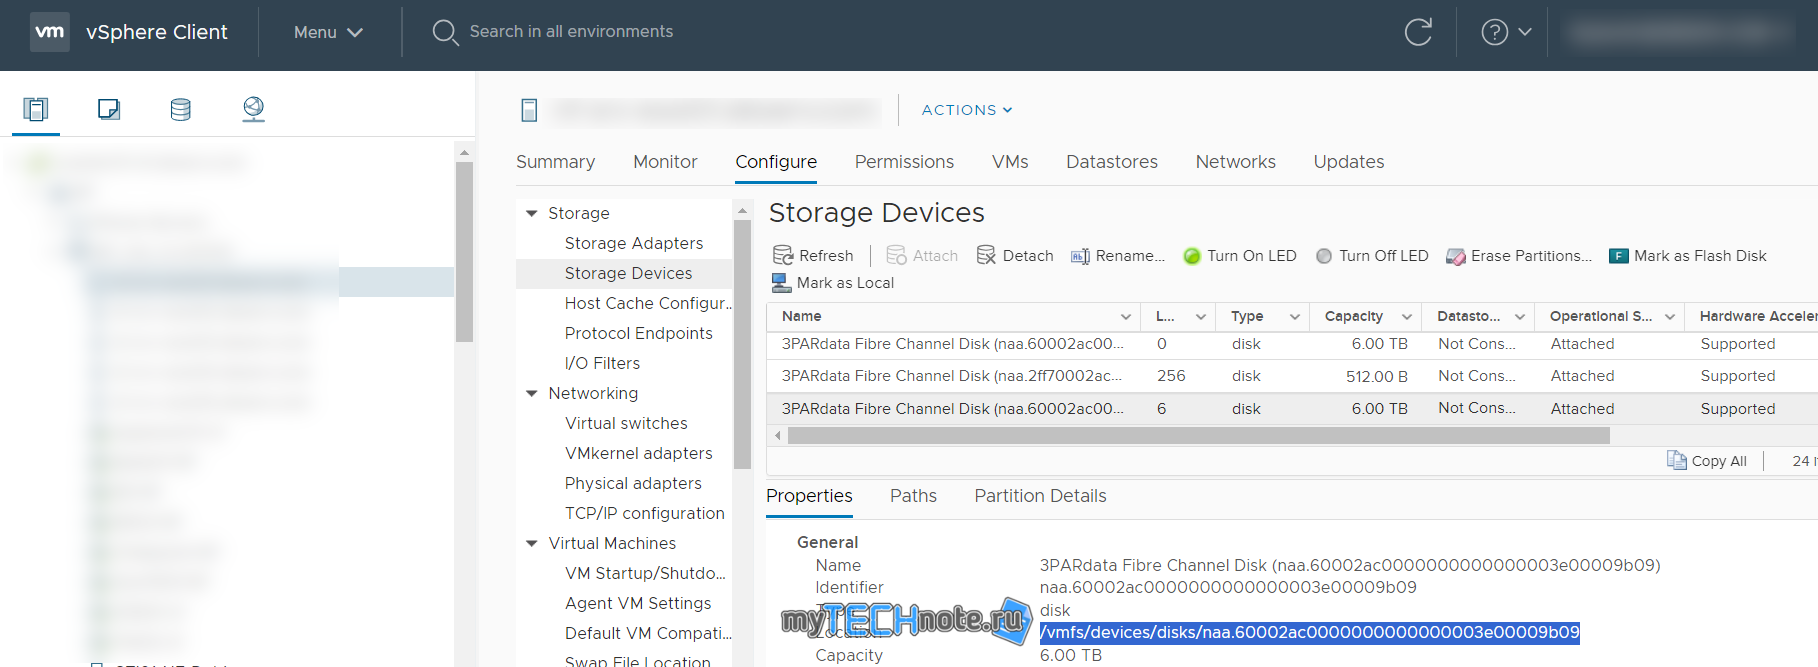
In our example, the path is: /vmfs/devices/disks/naa.60002ac0000000000000003e00009b09
Pinpointing First and Last Blocks
In an SSH session, check current partition table:
partedUtil getptbl /vmfs/devices/disks/naa.60002ac0000000000000003e00009b09

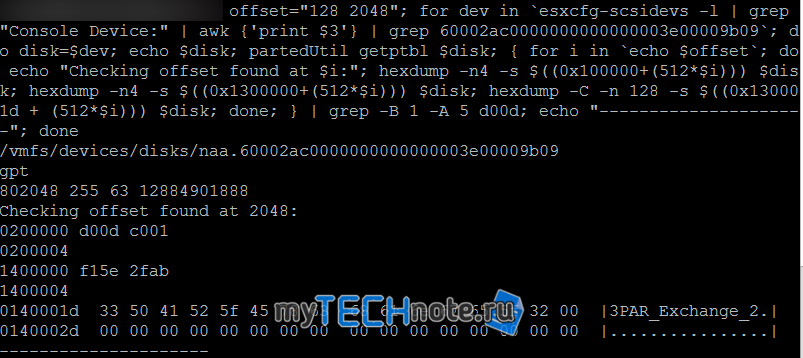
Let's locate the first and last blocks of the partition.
To find the first block, use this command:
offset="128 2048"; for dev in `esxcfg-scsidevs -l | grep "Console Device:" | awk {'print $3'} | grep 60002ac0000000000000003e00009b09`; do disk=$dev; echo $disk; partedUtil getptbl $disk; { for i in `echo $offset`; do echo "Checking offset found at $i:"; hexdump -n4 -s $((0x100000+(512*$i))) $disk; hexdump -n4 -s $((0x1300000+(512*$i))) $disk; hexdump -C -n 128 -s $((0x130001d + (512*$i))) $disk; done; } | grep -B 1 -A 5 d00d; echo "---------------------"; done
This command should display information about the partition, including its name and offset.
Next, find the last block:
partedUtil getUsableSectors /vmfs/devices/disks/naa.60002ac0000000000000003e00009b09

Handling Unknown Partition Table
If you encounter an "unknown partition table" message, attempt this command:
partedUtil mklabel /vmfs/devices/disks/naa.60002ac0000000000000003e00009b09 gpt
Validating VMFS Partition GUID
It's often AA31E02A400F11DB9590000C2911D1B8, but you can confirm using:
partedUtil showGuids

Attempting Partition Restoration
With this information:
LUN ID: naa.60002ac0000000000000003e00009b09
First block: 2048
Last block: 12884901854
Partition GUID: AA31E02A400F11DB9590000C2911D1B8
Let's create a partition marker:
partedUtil setptbl /vmfs/devices/disks/naa.60002ac0000000000000003e00009b09 gpt "1 2048 12884901854 AA31E02A400F11DB9590000C2911D1B8 0"

Confirm the table:
partedUtil getptbl /vmfs/devices/disks/naa.60002ac0000000000000003e00009b09

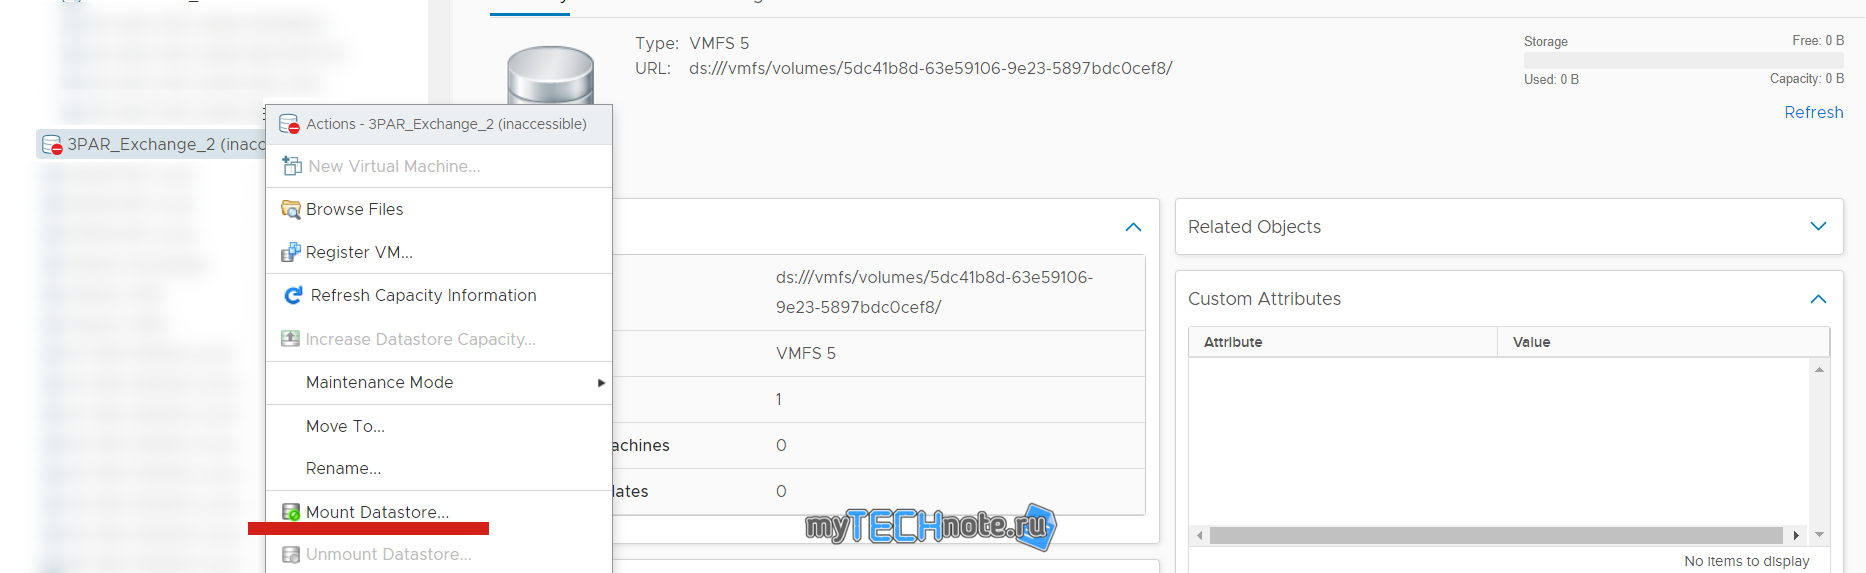
Mounting the Datastore
Now, attempt to mount the datastore:
vmkfstools -V
esxcli storage core adapter rescan –all
The datastore should now be visible in the vCenter web interface. If it's unmounted, proceed to remount it.
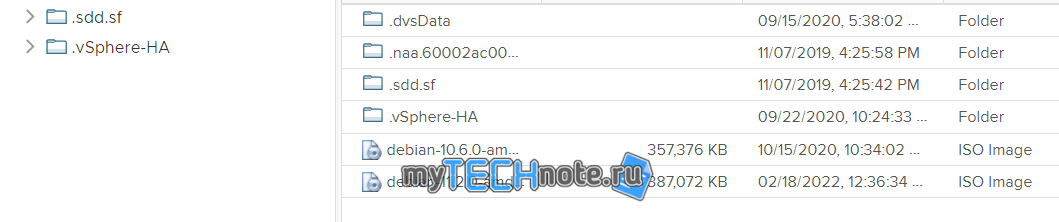
And the data is presented on the datastore.
Share the article with your friends in social networks, maybe it will be useful to them.
If the article helped you, you can >>thank the author<<