

In the world of websites, one aspect that often gets overlooked but is critically important is website backup. Ensuring that you have reliable backup procedures in place can be a lifesaver in case of unexpected issues, such as server crashes, data corruption, or security breaches. In this comprehensive guide, we will walk you through the entire process of creating backups for your website and transferring them to a safe location. We'll cover both the technical aspects and practical steps, making it easy for even beginners to follow along.
Why Regular Website Backup is Crucial for You:
Website backup is like an insurance policy for your online presence. It protects your hard work, investments, and valuable data from various potential threats. Here are some compelling reasons why you should prioritize website backup:
- Data Loss Prevention: In the digital realm, data is everything. Website backup ensures that your content, customer information, and files are safe from accidental deletion, hacking, or hardware failures.
- Security Measures: In the event of a security breach or malware attack, having a clean backup copy can save you from extensive damage and costly recovery efforts.
- Business Continuity: For e-commerce sites and businesses relying on their online presence, website downtime can result in significant revenue loss. A quick restoration from a backup minimizes downtime.
- Peace of Mind: Knowing that you have a recent backup at hand provides peace of mind, allowing you to focus on growing your website without constant worry.
Creating Website Backups: A Step-by-Step Tutorial
Before you start, ensure that you have the necessary access to your hosting and FTP server.
Step 1: Script for Creating Backups
Begin by creating a backup script that automates the backup process:
tar czf ~/domains/site.ru/backups/tmp/files.tgz ~/domains/site.ru/public_html/
mysqldump -h 'server.hosting.ru' -u 'user' -p'password' db_name>~/domains/mytechnote.ru/backups/tmp/mysql.sql
tar czf ~/domains/site.ru/backups/site_ru_$(date +"%Y-%m-%d").tgz ~/domains/site.ru/backups/tmp/*
rm -rf ~/domains/site.ru/backups/tmp/*
This script compresses your website files and performs a MySQL database dump. Be sure to customize paths and the connection parameters for your database.
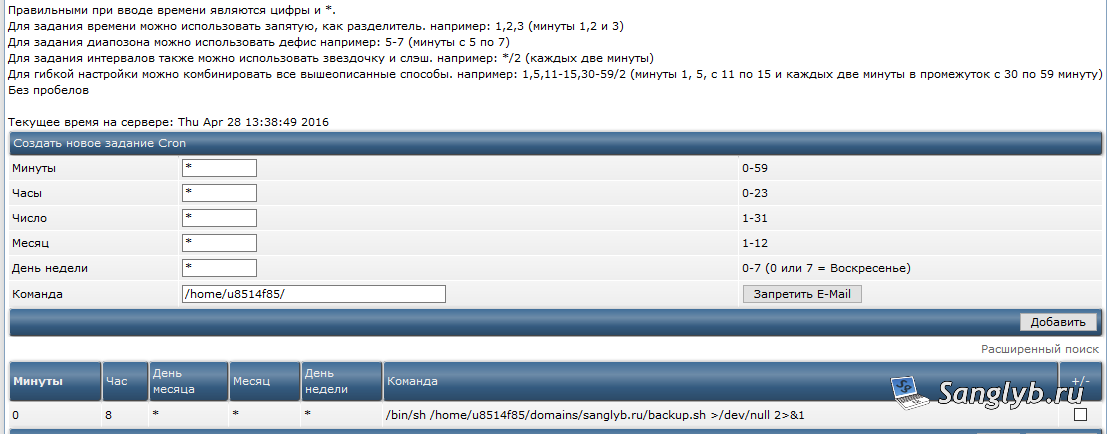
Step 2: Schedule Automatic Backups with Cron
To automate your backups, set up a cron job on your hosting server. The specific method may vary depending on your hosting provider, but the general process involves defining when the script should run. For daily backups at 8 AM, use a cron entry like this:
0 8 * * * /bin/sh /home/your_username/path/to/script/backup.sh
Transferring Backups via FTP: A Secure Approach
Step 1: Script for FTP Transfer
Next, create a script for transferring your backups via FTP. Ensure that your FTP user has access to the backup folder on your hosting server. Here's the FTP script:
#!/bin/bash
ftp -in ftp_IP_Address << END_SCRIPT
user your_username your_password
binary
cd /backups
lcd /mnt/wd-backup/backup/site
mget site*
mdelete site*
END_SCRIPT
Customize the script by specifying your FTP server details, username, and password.
Step 2: Schedule FTP Transfer
Schedule the FTP transfer script to run regularly. For daily transfers at 10 AM, use a cron entry like this:
0 10 * * * /bin/sh /home/sanglyb/scripts/ftp-copy.sh
By following these steps, you'll establish a robust website backup and transfer system. Your website data will be safeguarded against unexpected events, and you'll have peace of mind knowing that you can quickly recover in case of emergencies. Remember that regular backups are a crucial part of maintaining a secure and reliable online presence.
Video Tutorial:
Share the article with your friends in social networks, maybe it will be useful to them.
If the article helped you, you can >>thank the author<<