

In organizations that utilize computers for purposes such as video surveillance, monitoring, or kiosks, having an automatic login system in place can be highly convenient. I've previously discussed how to enable automatic login on a home computer, but the process differs for domain-connected machines. However, it's important to note a security consideration: the user's password will be stored in plain text in the Windows registry.
If security is not a major concern for your specific use case, here's how you can set up automatic login on a domain-connected computer:
Editing the Registry:
- Launch the Windows Registry Editor (regedit).
- Navigate to the following registry key: HKEY_LOCAL_MACHINE\SOFTWARE\Microsoft\Windows NT\CurrentVersion\Winlogon
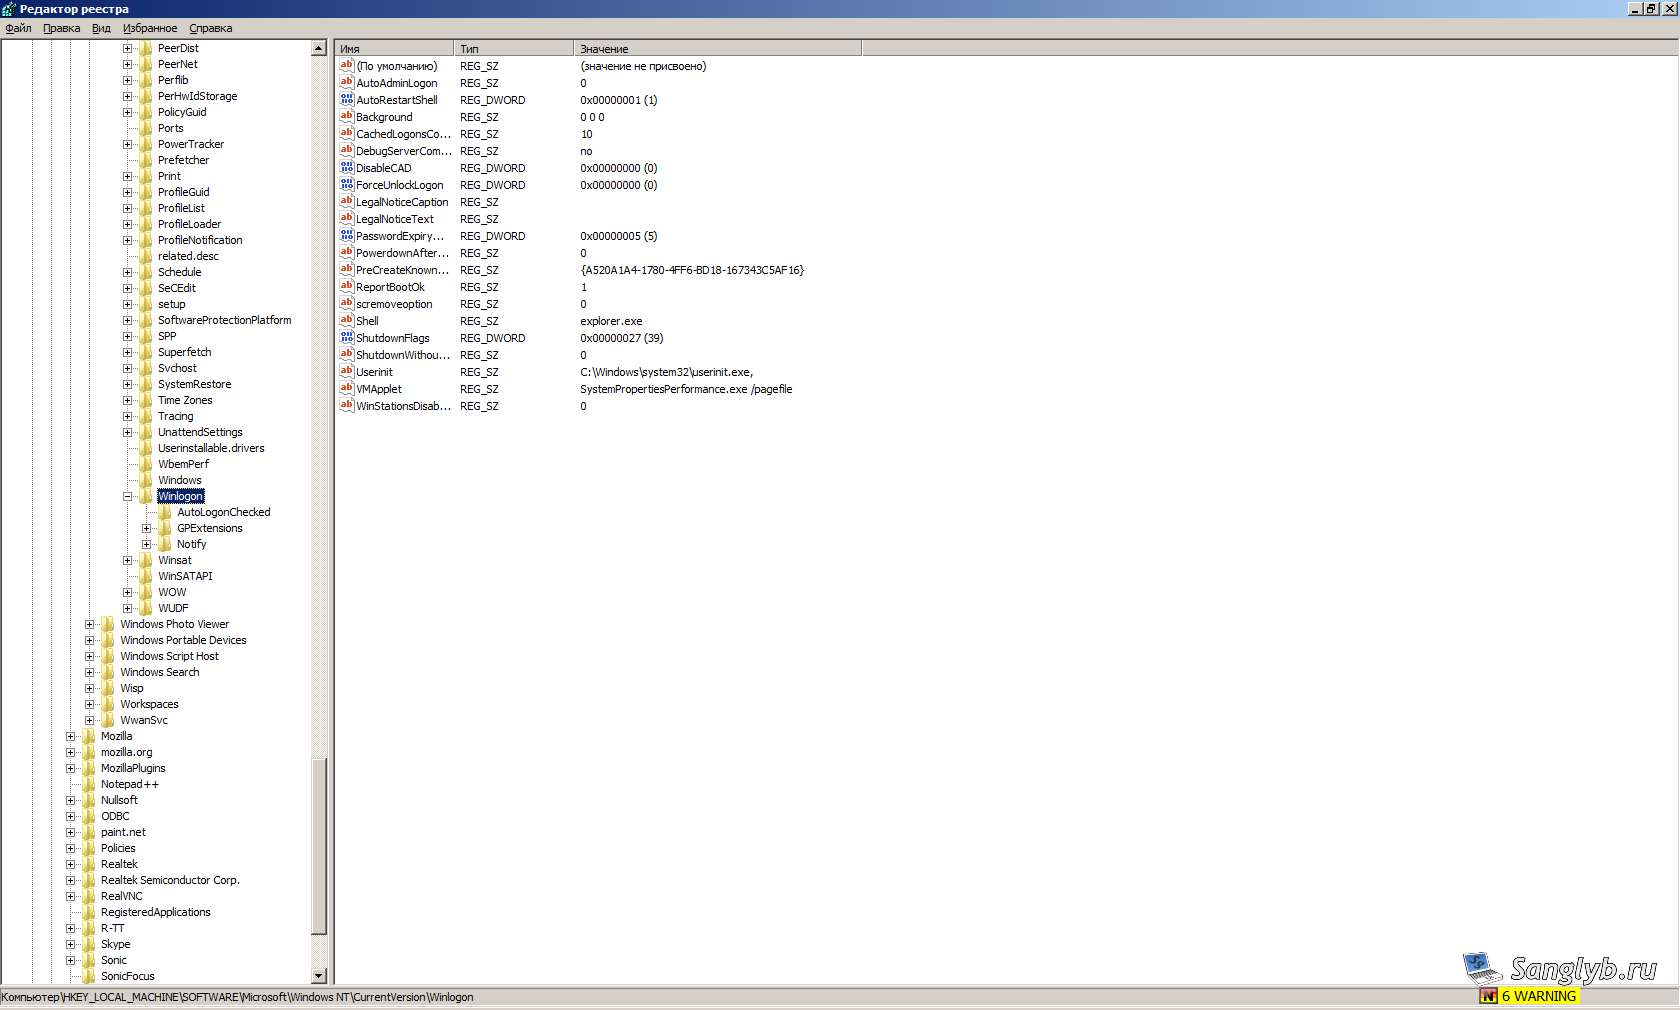
In this section of the registry, you'll need to create or modify several string values:
- DefaultUserName: Set this to the username of the user who should automatically log in (without including the domain).
- DefaultPassword: Enter the user's password as the value. Be cautious, as it will be stored in plain text.
- DefaultDomainName: Specify the domain name.
- AutoAdminLogon: Set this value to 1 to enable automatic login.
- If the parameter AutoLogonCount exists, delete it.
After making these registry changes, restart the computer. The user will now be able to log in without entering their password.
Video Tutorial:
Share the article with your friends in social networks, maybe it will be useful to them.
If the article helped you, you can >>thank the author<<