
Sometimes you need to add a watermark to several images. On the Internet, it is often advised to use either macros for Photoshop, or use scripts for Gimp. In fact, adding a watermark to several images can be done with much less effort, without using such monsters to process images.
There is a program - APhoto. The project's website is http://acein.cn/p/aphoto/ The program's beauty is that it is written in Java, and as a result is completely cross-platform. The condition for its launch is Java version 1.6 or higher. If you use Ubuntu then you can see the article - how to install Java 8 JDK, JRE в Ubuntu.
In general, go to the developer's site and download the zip archive with the program. Unpack the archive to any location and run the aphoto.jar file
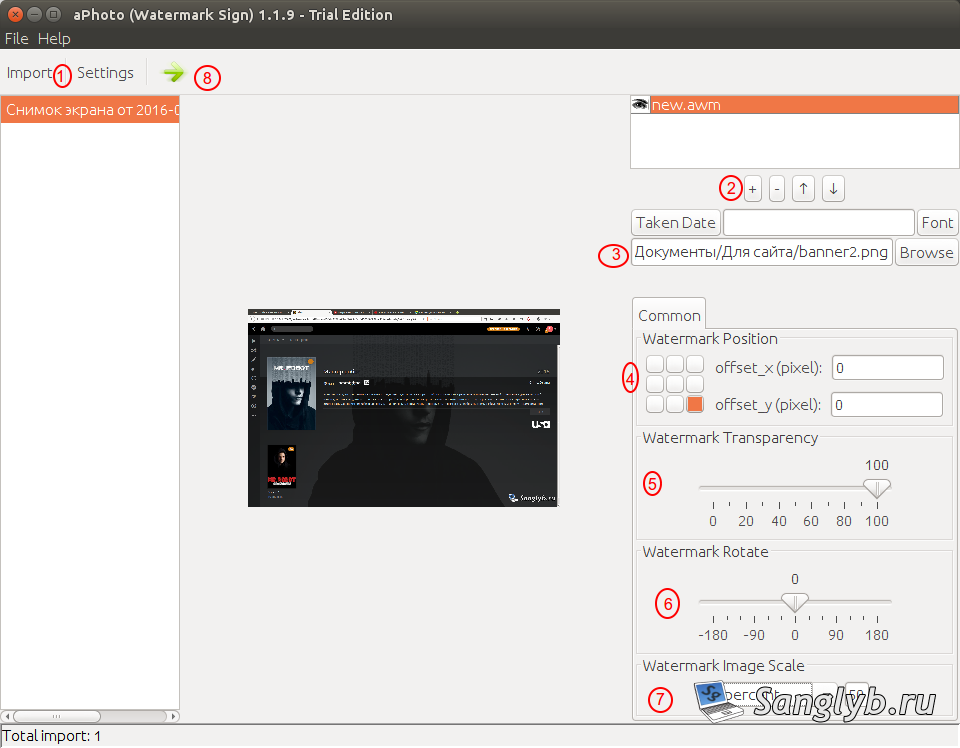
1) Click the Import button, in the opened window go to the image folder and select ./ if we want to import all images from this folder. If you want to add a watermark to only one image, only one image can be selected in the right part of the window.

2) On the right side of the box, click the plus button to create a new profile.
3) Below we specify the path to the image that is a watermark.
4) Specify the position of the watermark.
5) Specify the transparency.
6) Specify the rotation of the watermark image
7) We specify the size of the watermark.
8) Click the green arrow, the images will be exported. And the folder containing them will open.
Video on the topic:
Share the article with your friends in social networks, maybe it will be useful to them.
If the article helped you, you can >>thank the author<<